TubeInitializer Steppable
TubeInitializer arranges cells in a cylinder shape.
It is intended for 3D simulations. See Blob Initializer for 2D circles.
Properties
InnerRadius: Determines how hollow to make the tube. Set to 0 to fill the tube completely with cells.
OuterRadius: Determines the size of the tube. It must be greater than InnerRadius.
- Extrude: Controls the length of the tube. The rings of the tube are placed around the imaginary axis created between the From and To points.
From and To: Specify the top and bottom of the tube in positive integer 3D coordinates.
Width: Controls the thickness of each ring of cells in the tube.
- NumSlices: Controls how many cells should be placed on each ring.
Default: 8
- CellShape: Must be either
CubeorWedge. Default: Wedge
- Gap: Places the rings farther apart, and makes the slices “exploded” from one another (i.e. spaced out).
Default: 0
Example Syntax: Basic 3D Tube, Wedge-Shaped Cells
Add the below Steppable to your XML file. This example is on a 50x50x50 lattice and uses all the default properties.
<Steppable Type="TubeInitializer">
   <Region>
      <InnerRadius>3</InnerRadius>
      <OuterRadius>12</OuterRadius>
      <Gap>0</Gap>
      <Width>5</Width>
      <NumSlices>8</NumSlices>
      <Types>Condensing,NonCondensing</Types>
      <Extrude>
        <From x="15" y="25" z="0" />
        <To x="15" y="25" z="50" />
      </Extrude>
      <CellShape>Wedge</CellShape>
   </Region>
</Steppable>
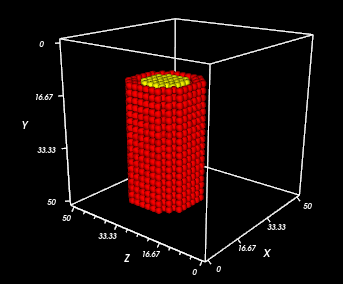
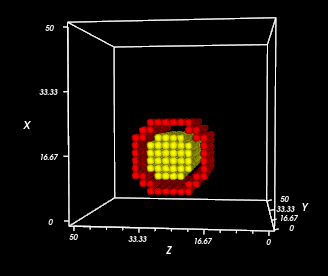
Result
Notice that one end of the tube is at (15, 25, 0) and the other end is at (15, 25, 0), so the tube is extruded along the z-axis. Since there are two cell types, the cells are randomly chosen to be red or yellow.
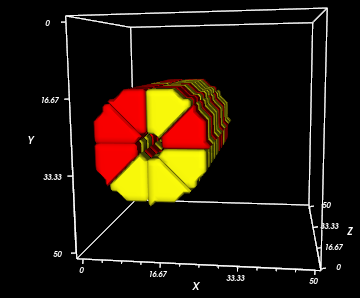
Example Syntax: Diagonal 3D Tube, Wedge-Shaped Cells
Now, NumSlices is 12,the InnerRadius is larger, and the From and To points have been changed to place the tube at an angle.
<Steppable Type="TubeInitializer">
   <Region>
      <InnerRadius>8</InnerRadius>
      <OuterRadius>12</OuterRadius>
      <Gap>0</Gap>
      <Width>3</Width>
      <NumSlices>12</NumSlices>
      <Types>Condensing,NonCondensing</Types>
      <Extrude>
        <From x="10" y="15" z="25" />
        <To x="45" y="25" z="25" />
      </Extrude>
   </Region>
</Steppable>
Result
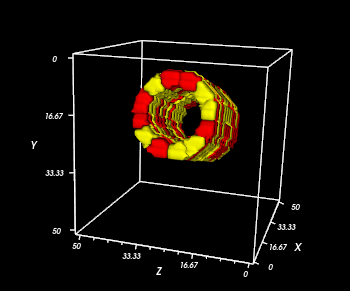
Example Syntax: Two-layer 3D Tube, Cube-Shaped Cells
Tubes can be nested within one another by specifying multiple Region tags
and by making the InnerRadius/OuterRadius smaller for one.
The cells have been made square-shaped by writing <CellShape>Cube</CellShape>.
<Steppable Type="TubeInitializer">
   <Region>
       <InnerRadius>8</InnerRadius>
       <OuterRadius>11</OuterRadius>
      <Gap>0</Gap>
      <Width>2</Width>
      <Types>Condensing</Types>
      <Extrude>
        <From x="15" y="45" z="25" />
        <To x="15" y="10" z="25" />
      </Extrude>
      <CellShape>Cube</CellShape>
   </Region>
   <Region>
       <InnerRadius>0</InnerRadius>
       <OuterRadius>7</OuterRadius>
      <Gap>0</Gap>
      <Width>2</Width>
      <Types>NonCondensing</Types>
      <Extrude>
        <From x="15" y="45" z="25" />
        <To x="15" y="10" z="25" />
      </Extrude>
      <CellShape>Cube</CellShape>
   </Region>
</Steppable>
Result