Compartments, FPP Links and Curvature - how to build elongated cells.
The goal of this tutorial is to teach you how to transform the most basic simulation involving just a single cell into a simulation involving multiple elongated cells where each cell is composed of compartments. We want the cells to stay elongated throughout the course of the simulation.
Understanding Contact Energies - how to avoid pixelated cells
Now that we know about compartments and how they are handled by CC3D, let’s see how we can translate our knowledge into building a simple simulation that involves contact energies. In particular, we want to show you a common pitfall that you may encounter in your work and how to diagnose it.
In fact this tutorial is an intro to a more sophisticated simulation where we will leverage Focal Point Plasticity Plugin and Curvature plugin.
Note
Our intention is to teach you how you can start building complex simulation from grounds up by starting with a single cell understand the behavior of the single cell under different set of parameters and gradually adding complexity to your simulation. We strongly believe that in order to build robust and complex simulations you first must master simple cases and build confidence needed to bring your modeling skills to the “next level”. It is very much like playing the piano, in general it is advised to learn how to play “Chopsticks” https://www.youtube.com/watch?v=JM5fjgiFrxg before attempting to play the “Flight of the Bumblebee” https://www.youtube.com/watch?v=M93qXQWaBdE
Let’s start. Our first simulation will involve single cell of type “Top” and two plugins - Volume and Contact. The goal is to make the cell look non-pixelized and do not disappear.
The code for this simulation can be found in Demos/CompuCellPythonTutorial/ElongatedCellsTutorial/Tutorial_01
Note
The Demos can be open from Player using File -> Demo Browser menu.
Alternatively you may navigate to https://github.com/CompuCell3D/CompuCell3D/tree/master/CompuCell3D/core/Demos
Here is the XML
<CompuCell3D>
    <Potts>
        <Dimensions x="100" y="100" z="1"/>
        <Steps>10000</Steps>
        <Temperature>10</Temperature>
        <Flip2DimRatio>1</Flip2DimRatio>
        <NeighborOrder>2</NeighborOrder>
    </Potts>


    <Plugin Name="Volume">
        <TargetVolume>25</TargetVolume>
        <LambdaVolume>2.0</LambdaVolume>
    </Plugin>


    <Plugin Name="CellType">
        <CellType TypeName="Medium" TypeId="0"/>
        <CellType TypeName="Top" TypeId="1"/>
    </Plugin>


    <Plugin Name="Contact">
        <Energy Type1="Medium" Type2="Medium">0</Energy>
        <Energy Type1="Top" Type2="Top">0</Energy>
        <Energy Type1="Top" Type2="Medium">0</Energy>
        <NeighborOrder>4</NeighborOrder>
    </Plugin>


</CompuCell3D>
Note that while we are using Contact Energy all the coefficients there are set to 0. As you can expect
Main Python script is simple
from cc3d import CompuCellSetup

from ElongatedCellsSteppables import ElongatedCellsSteppable

CompuCellSetup.register_steppable(steppable=ElongatedCellsSteppable(frequency=1))

CompuCellSetup.run()
and Python file with steppables is also not too complex:
from cc3d.core.PySteppables import *


class ElongatedCellsSteppable(SteppableBasePy):
    def __init__(self, frequency=1):

        SteppableBasePy.__init__(self, frequency)

    def start(self):
        """
        any code in the start function runs before MCS=0
        """
        top = self.new_cell(cell_type=1)
        self.cell_field[45:50, 25:30, 0] = top
In the steppable class ElongatedCellsSteppable we create a cell of type 1 (this is cell of type Top - see XML above).
The syntax self.cell_field[45:50, 25:30, 0] = top assigns pointer to cell top to all locations of the field enclosed
between pixels 45 to 50 along x-axis, pixels 45 to 50 along y-axis and pixels for which z=0. It follows the numpy (https://numpy.org/) convention.
The XML is also very simple. We defined 3 cell types there and set TargetVolume and LambdaVolume to 25 and 2.0
All contact energy coefficients are 0 - effectively stating that contact energy included in the actual simulation is always 0.
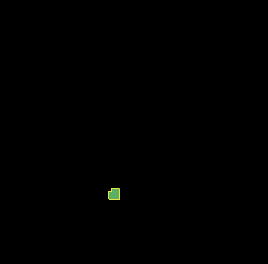
If we run this simulation we will get the following:

A partially pixelated cell is not particularly interesting but we should expect this. We created a square cell - see Steppable code above and after few MCS it disintegrated into few pieces. Because we have only volume energy there is nothing to prevent cell pixelization and any cell shape as long as the total number of pixel in the single cell is roughly 25 is perfectly fine.
Let’s try using contact energy to see if we can make the cell non-pixelized - Demos/CompuCellPythonTutorial/ElongatedCellsTutorial/Tutorial_02
The rationale is as follows: Volume energy will asure the number of pixel in the cell is roughly 25 and the
contact energy’s task will be to keep cell from pixelizing by
penalizing cell-Medium interface. As you recall, CC3D minimizes energy so if we use positive contact coefficient
between cell and the Medium, the simulation the pixelated cell will have quite a high energy - because many single
pixels are surrounded by Medium and each such pixel will bring up total energy by multiples of contact energy coefficient.
The actual number of interfaces between single pixel and Medium is control by <NeighborOrder> input in Contact Plugin.
In our case, we are including interfaces up to 4th nearest neighbor - <NeighborOrder>4</NeighborOrder> .
Let’s look at the new specification of Contact energy:
<Plugin Name="Contact">
    <Energy Type1="Medium" Type2="Medium">0</Energy>
    <Energy Type1="Top" Type2="Top">0</Energy>
    <Energy Type1="Top" Type2="Medium">15</Energy>
    <NeighborOrder>4</NeighborOrder>
</Plugin>
By changing contact energy coefficient between Top cells and Medium to a positive number CC3D will work to
minimize Top-Medium interfaces while maintaining total number of pixels of the cell (due to Volume energy term).
It turns out that the cell disappears. Why? This is because Volume energy term was not “strong enough” to overcome minimization of energy coming from Contact energy. Simply put when we get to one-pixel cell and we try to overwrite this pixel by Medium the Volume energy plugin will contribute positive term to change of energy and Contact energy will contribute negative term (because loosing cell medium interfaces leads to a negative change energy).
Let’s try fixing it by “strengthening” Volume energy term
<Plugin Name="Volume">
    <TargetVolume>25</TargetVolume>
    <LambdaVolume>4.0</LambdaVolume>
</Plugin>
This time we get the desired result.
Let’s add few more cells (including of type Center).
class ElongatedCellsSteppable(SteppableBasePy):
    def __init__(self, frequency=1):

        SteppableBasePy.__init__(self, frequency)

    def start(self):
        """
        any code in the start function runs before MCS=0
        """
        top = self.new_cell(cell_type=1)
        self.cell_field[45:50, 25:30, 0] = top

        center_1 = self.new_cell(cell_type=2)
        self.cell_field[45:50, 30:35, 0] = center_1

        top_1 = self.new_cell(cell_type=1)
        self.cell_field[45:50, 35:40, 0] = top_1
and let’s create a situation where cells “prefer” to be surrounded by Medium and not touch each other. This means contact energy coefficient between cell and Medium is lower than contact energy between two cells:
<Plugin Name="Contact">
    <Energy Type1="Medium" Type2="Medium">0</Energy>
    <Energy Type1="Top" Type2="Top">30</Energy>
    <Energy Type1="Top" Type2="Medium">15</Energy>
    <Energy Type1="Center" Type2="Medium">15</Energy>
    <Energy Type1="Center" Type2="Center">30</Energy>
    <Energy Type1="Center" Type2="Top">30</Energy>
    <NeighborOrder>4</NeighborOrder>
</Plugin>
When we run this new simulation (Demos/CompuCellPythonTutorial/ElongatedCellsTutorial/Tutorial_03) we get the following:
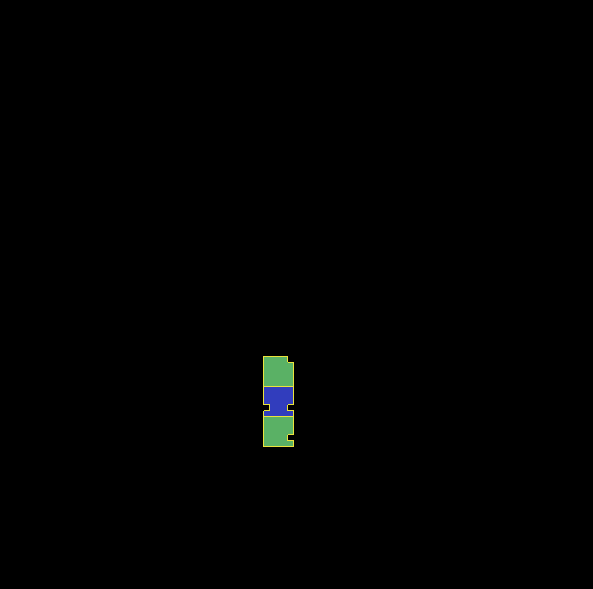
Cells that initially stick to each other after few steps are separated but each cell is in a non-pixelated form.
Writing Convenience function to create elongated cell
When we look at the Python code above where we created 3 cells we can see that it would be nice to have a function that would create entire cell for us. Here is a prototype of such function:
The entire code can be found here: Demos/CompuCellPythonTutorial/ElongatedCellsTutorial/Tutorial_04
class ElongatedCellsSteppable(SteppableBasePy):
    def __init__(self, frequency=1):

        SteppableBasePy.__init__(self, frequency)

    def start(self):
        self.create_arranged_cells(x_s=25, y_s=25, size=5, cell_type_ids=[1, 2, 2, 2, 2, 1])
        for cell in self.cell_list:
            print("cell id=", cell.id, " cluster_id=", cell.clusterId)

    def create_arranged_cells(self, x_s, y_s, size, cell_type_ids=None):
        """
        this function creates vertically arranged cells.

        x_s, ys - coordinates of bottom_left corner of the cell arrangement
        size - size of the cell arrangement
        cell_type_ids - list of cell type ids

        """
        for i, cell_type_id in enumerate(cell_type_ids):
            cell = self.new_cell(cell_type=cell_type_id)
            self.cell_field[x_s : x_s + size, y_s + i * size : y_s + (i + 1) * size, 0] = cell
This function iterates over a list of cell_type_ids and for each new cell type listed it creates a new cell of this
type that is placed 5 pixel above previous cell. Note that we want to have cell types of “first” and “last” cell to be different because
they will play a special role as we start using FocalPointPlasticity Links and ExternalPotential plugins later in the chapter
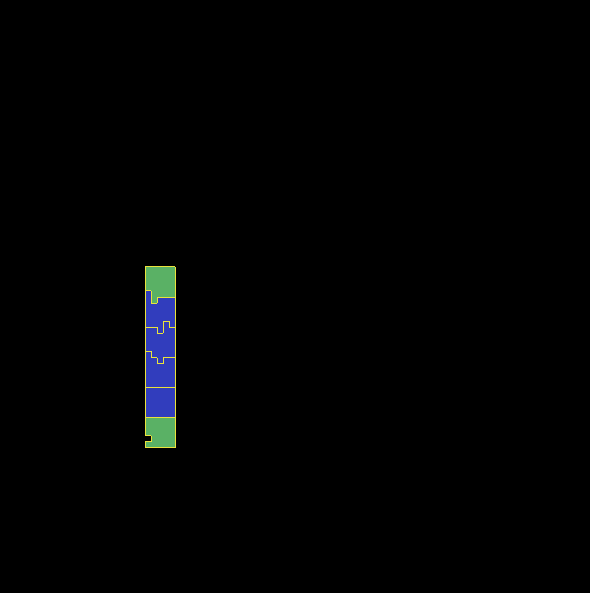
When we run the simulation we will see the following initial configuration (after first MCS and after several MCS):

Adding convenience functions to your steppables will make your code easier to read and maintain
Making Compartmentalized Cell
To understand better the concept of compartmentalized cell we added a printout in the start function that prints
cells’ cell.id and clusterId. When we dont have compartmentalized cells in our simulation, no two cells share
the same clusterId or each cell’s id is paired with a distinct clusterId - as we can see from the printout
below:
cell id= 1  clusterId= 1
cell id= 2  clusterId= 2
cell id= 3  clusterId= 3
cell id= 4  clusterId= 4
cell id= 5  clusterId= 5
cell id= 6  clusterId= 6
Let’s change it. Instead of creating 6 independent cells let’s assign them to the same cluster so that our six cells
will now be turned into compartments of a single cell with clusterId 1. From the modeling point of view this
corresponds to a situation where you would like your biological cells be represented with more level of internal details.
Perhaps you would like to simulate polarized cells, or perhaps you may want to better control shape of cells.
Here the code (Demos/CompuCellPythonTutorial/ElongatedCellsTutorial/Tutorial_05) that turns six
independent cells in to six compartments of a single compartmentalized cell:
def create_arranged_cells(self, x_s, y_s, size, cell_type_ids=None):
    """
    this function creates vertically arranged cells.

    x_s, ys - coordinates of bottom_left corner of the cell arrangement
    size - size of the cell arrangement
    cell_type_ids - list of cell type ids

    """
    cluster_id = None
    for i, cell_type_id in enumerate(cell_type_ids):
        cell = self.new_cell(cell_type=cell_type_id)

        if i == 0:
            cluster_id = cell.clusterId
        else:
            # to make all cells created by this function, we must reassign clusterId
            # of all the cells created by this function except the first one
            # When the first cell gets created, it gets reassigned clusterId by
            # CompuCell3D and we will use this clusterId to assign it to all other cells created by this function
            self.reassign_cluster_id(cell=cell, cluster_id=cluster_id)
        self.cell_field[x_s : x_s + size, y_s + i * size : y_s + (i + 1) * size, 0] = cell
and here is the printout of cell ``id``s and ``clusterId``s:
cell id= 1  clusterId= 1
cell id= 2  clusterId= 1
cell id= 3  clusterId= 1
cell id= 4  clusterId= 1
cell id= 5  clusterId= 1
cell id= 6  clusterId= 1
As we can tell all 6 cells share the same clusterId which means they represent single compartmentalized cells
that is composed of 6 compartments.
It is interesting how we have accomplished this assignment. It is worth pointing out that naive assignment of cell.id
or cell.clusterId , for example cell.clusterId = 20 will lead to an error:
AttributeError: ASSIGNMENT cell. clusterId=1 is illegal. clusterId is read only variable
Instead you must use steppable built-in function called self.reassign_cluster_id to reassign clusterId of a cell
If we look at the code - create_arranged_cells - notice that when we iterate over list of cell_type_ids
we first create cell and then we keep track of the clusterId of the first cell that was created inside the for
loop. For each subsequently created cell we reassign it’s clusterId attribute to match the clusterId of the
cell that was created first. Normally when new cell gets created CC3D will bump both cell.id and cell.clusterId
but by reassigning we are correcting CC3D default behavior so all six cells end up with clusterId 1.
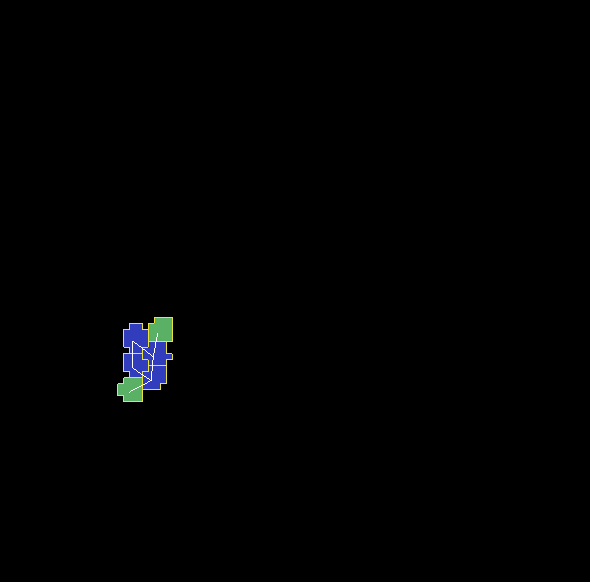
Here is the initial configuration of the cell field:
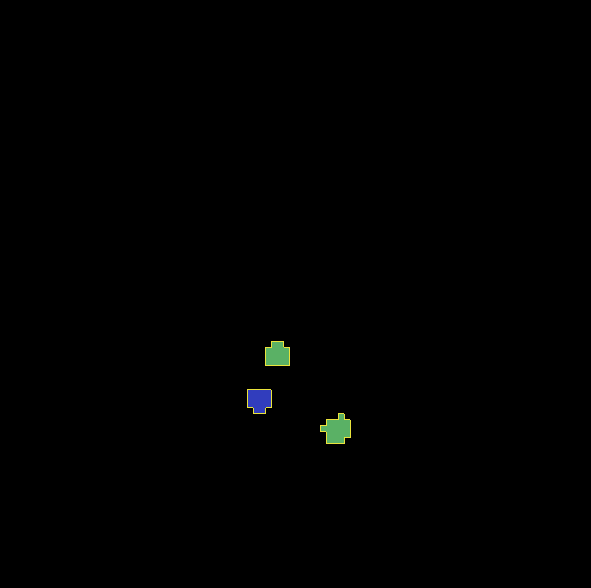
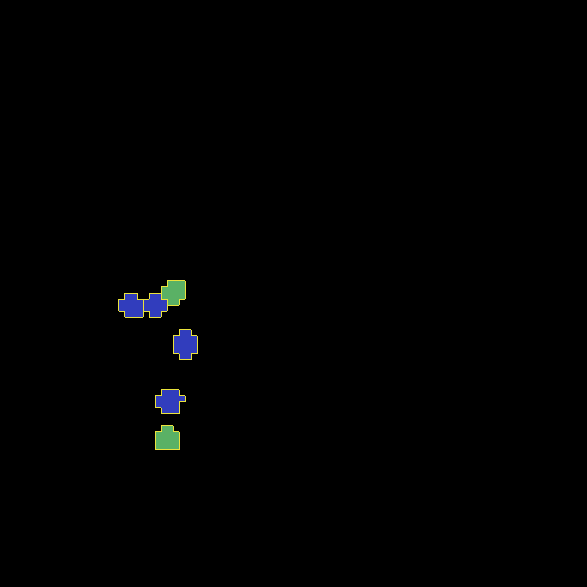
But if we run simulation a bit longer we will get the following:

This is not what we expected. In the previous simulation all cells were nicely separated, but now, with the same energy parameters we are getting a completely different simulation where cells are pixelated and intermixed with each other. The only change we did was reassigning ``clusterId``s. The explanation is simple but not obvious. The Contact energy plugin that controls whether cells like to stick to each other or like to be surrounded by Medium works only between cells that are members of different clusters. Contact energy plugin computes adhesion energy between cells that are members of different clusters but when two cells that belong to the same cluster touch each other such junctions are ignored by contact energy. In other words, if we have 5 compartments, i.e. 5 cells that are members of the same cluster the contribution of Contact energy will be 0 regardles if those cells are far apart of clustered together. Those cell-cell interfaces within a single cluster will not contribute anything to the change of energy. Therefore, in order to minimize energy CC3D will bundle cells together, in order to minimize cell-Medium interfaces because Medium is considered a separate cluster so in our simulation we will have two clusters - Medium and cluster composed of 5 cells. Each such interface between those two clusters contributes 15 units of energy and CC3D minimizes those contributions by bundling cells together into a single domain
To make sure this is indeed the case, go back to Demos/CompuCellPythonTutorial/ElongatedCellsTutorial/Tutorial_04 and change
definition of Contact energy to looks as follows:
<Plugin Name="Contact">
    <Energy Type1="Medium" Type2="Medium">0</Energy>
    <Energy Type1="Top" Type2="Top">0</Energy>
    <Energy Type1="Top" Type2="Medium">15</Energy>
    <Energy Type1="Center" Type2="Medium">15</Energy>
    <Energy Type1="Center" Type2="Center">0</Energy>
    <Energy Type1="Center" Type2="Top">0</Energy>
    <NeighborOrder>4</NeighborOrder>
</Plugin>
and you will get exactly the same cell shape as we did in the current simulation with compartmentalized cells.
ContactInternal Plugin
To restore the expected behavior (where we have 6 cells that are members of the same cluster but are not
intermingled with each other) we need to add a plugin that will count energy contributions coming from interfaces
between cells that belong to the same cluster. Here is the XML code we need to include -
Demos/CompuCellPythonTutorial/ElongatedCellsTutorial/Tutorial_06:
<Plugin Name="Contact">
    <Energy Type1="Medium" Type2="Medium">0</Energy>
    <Energy Type1="Top" Type2="Top">30</Energy>
    <Energy Type1="Top" Type2="Medium">15</Energy>
    <Energy Type1="Center" Type2="Center">30</Energy>
    <Energy Type1="Center" Type2="Top">30</Energy>
    <Energy Type1="Center" Type2="Medium">15</Energy>

    <NeighborOrder>4</NeighborOrder>
</Plugin>

<Plugin Name="ContactInternal">

    <Energy Type1="Top" Type2="Top">30</Energy>
    <Energy Type1="Center" Type2="Center">30</Energy>
    <Energy Type1="Center" Type2="Top">30</Energy>


    <NeighborOrder>4</NeighborOrder>
</Plugin>
Contact and ContactInternal work in tandem. Contact takes care of interfaces between cells that belong to different clusters while ContactInternal computes energies coming from interfaces between cells belonging to the same cluster. Now each cell-cell interface coming from same cluster will add 30 units of energy which combined with 15 units between cell and Medium will cause cells to avoid intermingling.
FocalPointPlasticity Plugin - constraining intercellular distances
Now that we understand how to handle Contact and ContactInternal plugins, let us focus attention on energy terms that will allow us to constrain distances between cells. FocalPointPlasticity Plugin (FPP) is one of the solutions.
This plugin implements energy term that penalizes deviations from target distance between two cells that are connected
by FPP link. This plugin is described in details in FocalPointPlasticity Plugin, but it is worth mentioning that
this plugin has separate mechanisms for handling links between cells that are part of the same cluster and cells that
are part of different clusters. The simulation code we will use in this section is in Demos/CompuCellPythonTutorial/ElongatedCellsTutorial/Tutorial_07
In order to add spring-like links between members of the same cluster we need to add the following section to the XML
 <Plugin Name="FocalPointPlasticity">

     <InternalParameters Type1="Top" Type2="Center">
         <Lambda>100.0</Lambda>
         <ActivationEnergy>-50.0</ActivationEnergy>
         <TargetDistance>5</TargetDistance>
         <MaxDistance>10.0</MaxDistance>
         <MaxNumberOfJunctions>1</MaxNumberOfJunctions>
     </InternalParameters>

     <InternalParameters Type1="Center" Type2="Center">
         <Lambda>100.0</Lambda>
         <ActivationEnergy>-50.0</ActivationEnergy>
         <TargetDistance>5</TargetDistance>
         <MaxDistance>10.0</MaxDistance>
         <MaxNumberOfJunctions>2</MaxNumberOfJunctions>
     </InternalParameters>

</Plugin>
Because in our initial compartment arrangement we have two Top cells capping the “ends” of the cluster we want to allow only
a single internal (i.e. between compartments) link between Top and Center cells. However for Center cells
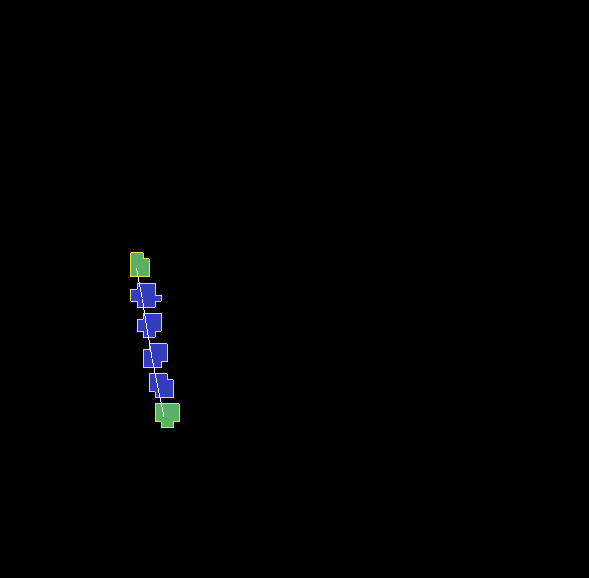
we will allow two internal links. Let’s run the simulation and turn on visualization of the links (Visualization-> FPP Links):
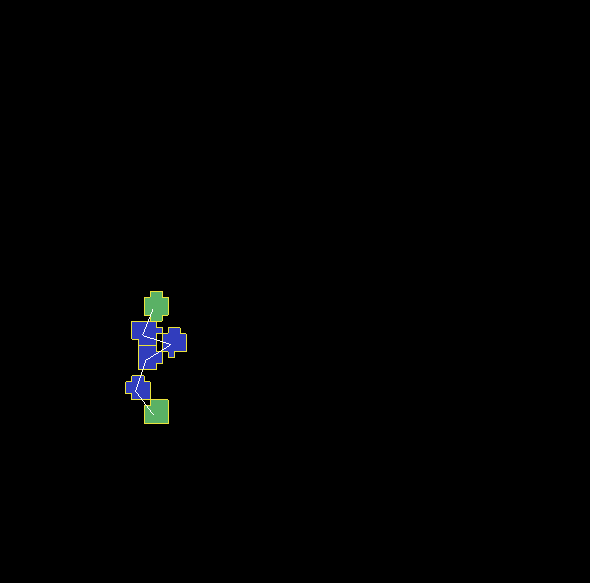
After few MCS (FPP links might take few MCS to form because there is stochasticity involved in establishing links between cells) we will see the following picture
If we let the simulation run for a while, however, we will see that while the distance between cells is maintained, the cells do not become elongated.
Additionally, if we lower FPP Lambdas from 100 to 10:
 <Plugin Name="FocalPointPlasticity">

     <InternalParameters Type1="Top" Type2="Center">
         <Lambda>10.0</Lambda>
         <ActivationEnergy>-50.0</ActivationEnergy>
         <TargetDistance>5</TargetDistance>
         <MaxDistance>10.0</MaxDistance>
         <MaxNumberOfJunctions>1</MaxNumberOfJunctions>
     </InternalParameters>

     <InternalParameters Type1="Center" Type2="Center">
         <Lambda>10.0</Lambda>
         <ActivationEnergy>-50.0</ActivationEnergy>
         <TargetDistance>5</TargetDistance>
         <MaxDistance>10.0</MaxDistance>
         <MaxNumberOfJunctions>2</MaxNumberOfJunctions>
     </InternalParameters>

</Plugin>
We will see that Center cells that initially touched Top cell form additional links between themselves.
This happens because those two Center cells can form two links between Center themselves. The first link is formed
at the beginning of the simulation but during the course of the simulation , when those two Center cells come together
(e.g. due to weak FPP Lambda) there is nothing keeping them form forming another link.
Note
To prevent this situation where Center cells form a “triangle of links” you may add an override in the FocalPointPlasticity
Plugin that will cap number of total links that Center cells can form to 2 links:
 <Plugin Name="FocalPointPlasticity">

     <InternalParameters Type1="Top" Type2="Center">
         <Lambda>100.0</Lambda>
         <ActivationEnergy>-50.0</ActivationEnergy>
         <TargetDistance>5</TargetDistance>
         <MaxDistance>10.0</MaxDistance>
         <MaxNumberOfJunctions>1</MaxNumberOfJunctions>
     </InternalParameters>

     <InternalParameters Type1="Center" Type2="Center">
         <Lambda>100.0</Lambda>
         <ActivationEnergy>-50.0</ActivationEnergy>
         <TargetDistance>5</TargetDistance>
         <MaxDistance>10.0</MaxDistance>
         <MaxNumberOfJunctions>2</MaxNumberOfJunctions>
     </InternalParameters>

     <InternalMaxTotalNumberOfLinks CellType="Center">2</InternalMaxTotalNumberOfLinks>

</Plugin>
Curvature Plugin
Let us now put everything together and implement elongated compartmentalized cell. The solution that will prevent two
Center cells (the ones that initially were touching Top cell), from forming an extra FPP link,
is to use Curvature Plugin. The Curvature Plugin constrains the angle at which two adjacent links can form.
By using high value of Curvature lambda you may constrain two adjacent links to form a straight line
and by adiabatically lowering the lambda you can control how much elongated cell can bend.
The code for this section is in Demos/CompuCellPythonTutorial/ElongatedCellsTutorial/Tutorial_08
Here is the code that we add to the XML to enable Curvature energy calculations:
<Plugin Name="Curvature">

    <InternalParameters Type1="Top" Type2="Center">
        <Lambda>1000.0</Lambda>
        <ActivationEnergy>-50.0</ActivationEnergy>
    </InternalParameters>

    <InternalParameters Type1="Center" Type2="Center">
        <Lambda>1000.0</Lambda>
        <ActivationEnergy>-50.0</ActivationEnergy>
    </InternalParameters>


    <InternalTypeSpecificParameters>
        <Parameters TypeName="Top" MaxNumberOfJunctions="1" NeighborOrder="1"/>
        <Parameters TypeName="Center" MaxNumberOfJunctions="2" NeighborOrder="1"/>
    </InternalTypeSpecificParameters>

</Plugin>
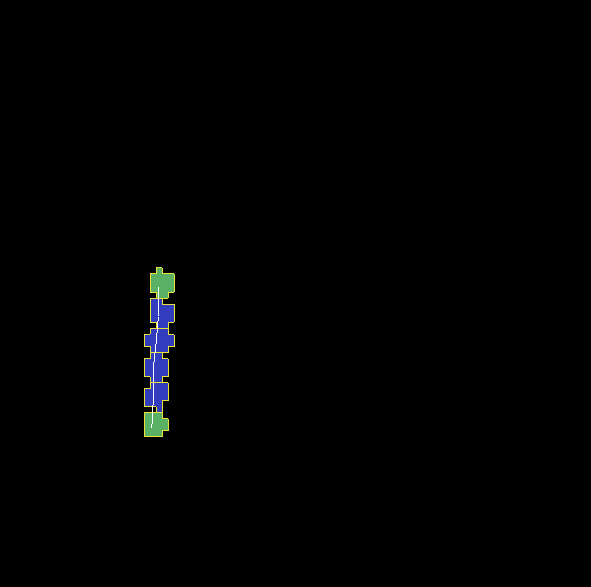
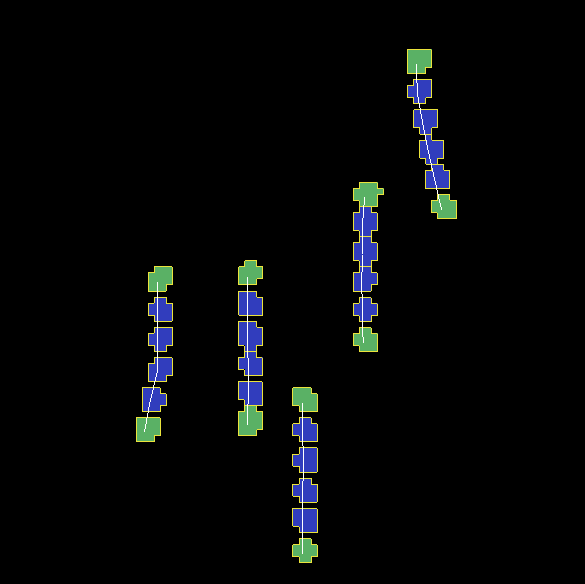
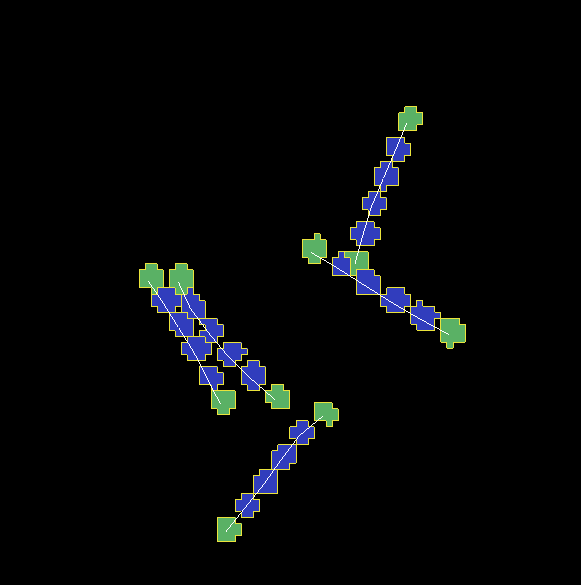
With this extra addition the compartments will form a line even if we let the simulation run for a very long time:
As you probably have noticed, the syntax for this plugin resembles the syntax of the FPP plugin - we have <Lambda>,
<ActivationEnergy>, MaxNumberOfJunctions . This is because Curvature plugin establishes its own set of “links” between
cells but those links are not used to penalize intercellular distance but rather to penalize the deviation from straight line
arrangement of compartment cells
Adding persistent motion to cells
Let us add a bit more code to make this simulation more interesting. First, we will create more cells. We will use
our convenience function create_arranged_cells and as a result all of those cells will be arranged vertically -
this will not be a problem though because, next, we will be applying random force to the “first” cell of each cluster i.e.
to the cell that is created first in each cluster. We will store a list of “first” cells inside member variable
self.list_of_leading_cells = [] which is a list.
Before we apply any force, we will give simulation a generous 300 MCS for all the FPP links to get established.
If we applied force before links are established it is likely that some Top cell could have moved away from the
cluster before links had a chance to form. Next, every 500 MCS we will reassign random forces applied to “first” cells.
The simulation code can be found in Demos/CompuCellPythonTutorial/ElongatedCellsTutorial/Tutorial_09
In terms of XML modification, we only need to add a one-liner that enables ExternalPotential plugin that simulates external force:
<Plugin Name="ExternalPotential"/>
Notice that we do not specify any parameters because we will use Python to set force vectors applied to “first” cells
We also have to be careful to ensure that cells stored in that list do not disappear because if the do disappear and we try to reference them we will get Segmentation Fault Error. We will show later how we could avoid this issue in the code , just to show you how to handle situation of that type.
The ElongatedCellsSteppables.py is more interesting:
from cc3d.core.PySteppables import *
import random


class ElongatedCellsSteppable(SteppableBasePy):
    def __init__(self, frequency=1):

        SteppableBasePy.__init__(self, frequency)
        self.list_of_leading_cells = []
        self.maxAbsLambdaX = 10

    def start(self):
        # creating 5 "vertical" compartmental cells that are separated from each other in the x direction
        # each compartmental consists of 5 compartments that have cell type ids: 1, 2, 2, 2, 1 respectively
        self.create_arranged_cells(x_s=25, y_s=25, size=5, cell_type_ids=[1, 2, 2, 2, 2, 1])
        self.create_arranged_cells(x_s=40, y_s=25, size=5, cell_type_ids=[1, 2, 2, 2, 2, 1])

        self.create_arranged_cells(x_s=50, y_s=5, size=5, cell_type_ids=[1, 2, 2, 2, 2, 1])
        self.create_arranged_cells(x_s=60, y_s=40, size=5, cell_type_ids=[1, 2, 2, 2, 2, 1])
        self.create_arranged_cells(x_s=70, y_s=60, size=5, cell_type_ids=[1, 2, 2, 2, 2, 1])

        for cell in self.cell_list:
            print("cell id=", cell.id, " clusterId=", cell.clusterId)

    def create_arranged_cells(self, x_s, y_s, size, cell_type_ids=None):
        """
        this function creates vertically arranged cells.

        x_s, ys - coordinates of bottom_left corner of the cell arrangement
        size - size of the cell arrangement
        cell_type_ids - list of cell type ids

        """
        cluster_id = None
        for i, cell_type_id in enumerate(cell_type_ids):
            cell = self.new_cell(cell_type=cell_type_id)

            if i == 0:
                cluster_id = cell.clusterId
                self.list_of_leading_cells.append(cell)
            else:
                # to make all cells created by this function, we must reassign clusterId
                # of all the cells created by this function except the first one
                # When the first cell gets created, it gets reassigned clusterId by
                # CompuCell3D and we will use this clusterId to assign it to all other cells created by this function
                self.reassign_cluster_id(cell=cell, cluster_id=cluster_id)
            self.cell_field[x_s : x_s + size, y_s + i * size : y_s + (i + 1) * size, 0] = cell

    def step(self, mcs):

        if mcs < 300:
            return

        if not mcs % 500:
            # randomize force applied to leading cell
            for cell in self.list_of_leading_cells:
                cell.lambdaVecX = random.randint(-self.maxAbsLambdaX, self.maxAbsLambdaX)
                cell.lambdaVecY = random.randint(-self.maxAbsLambdaX, self.maxAbsLambdaX)
Inside the step method we create not one but several linear clusters - notice how we vary location of
bottom left coordinates of each cluster.
Inside constructor:
def __init__(self, frequency=1):

    SteppableBasePy.__init__(self, frequency)
    self.list_of_leading_cells = []
    self.maxAbsLambdaX = 10
we create self.list_of_leading_cells that holds cell objects representing “first” cells of each cluster. Storing of the
“first” cell of each cluster takes place inside self.create_arranged_cells method.
We also add a convenience variable self.maxAbsLambdaX = 10 that determines absolute value of
force component - in x or y directions.
We also introduce step(self, mcs) which “does nothing” for first 300 MCS and after 300 mcs it assigns a random force to each cell
in the self.list_of_leading_cells every 500 MCS - we use if not mcs % 500: to execute code every 500 MCS.
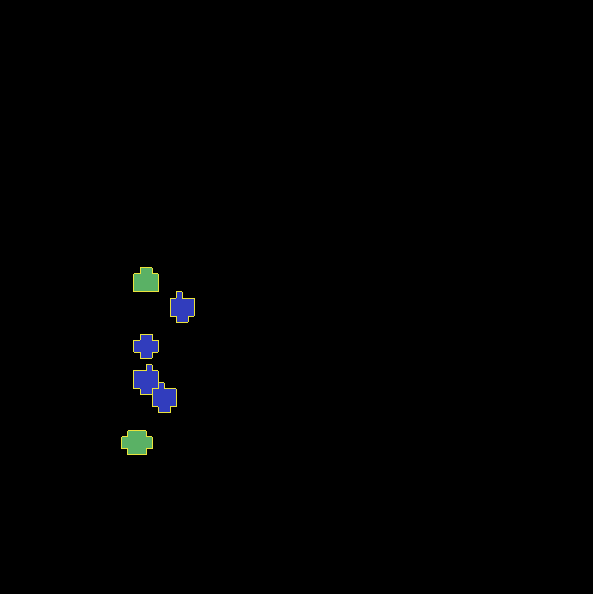
Here are few screenshots of the simulation:
MCS=447:
MCS=1125:
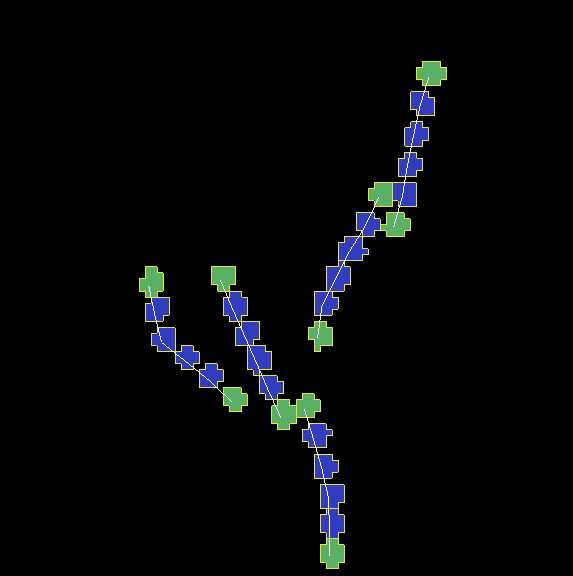
MCS=4006:
MCS=8289:
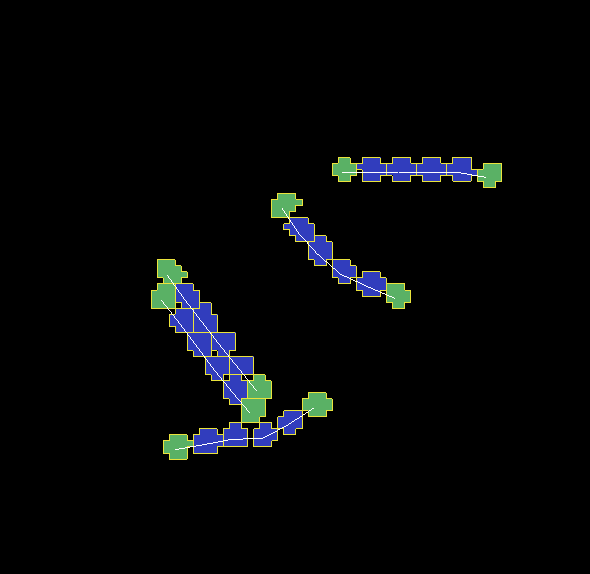
Notice, how cells belonging to a different clusters in general to not “mix with each other”. We can control this behavior by adjusting Contact energy plugin coefficients - because they govern interactions between cells belonging to different clusters
Note
It is possible that you may apply a force that is too large and FPP links may break. To handle situations like this you should run simulation many times and observe issues and write a code that addresses them
Let us write a more robust code is better prepared to handle cells that may disappear (Top cells to which we apply the force)
class ElongatedCellsSteppable(SteppableBasePy):
    def __init__(self, frequency=1):

        SteppableBasePy.__init__(self, frequency)
        self.leading_cells_ids = set()
        self.maxAbsLambdaX = 10

    def start(self):
        self.create_arranged_cells(x_s=25, y_s=25, size=5, cell_type_ids=[1, 2, 2, 2, 2, 1])
        self.create_arranged_cells(x_s=40, y_s=25, size=5, cell_type_ids=[1, 2, 2, 2, 2, 1])

        self.create_arranged_cells(x_s=50, y_s=5, size=5, cell_type_ids=[1, 2, 2, 2, 2, 1])
        self.create_arranged_cells(x_s=60, y_s=40, size=5, cell_type_ids=[1, 2, 2, 2, 2, 1])
        self.create_arranged_cells(x_s=70, y_s=60, size=5, cell_type_ids=[1, 2, 2, 2, 2, 1])

        for cell in self.cell_list:
            print("cell id=", cell.id, " clusterId=", cell.clusterId)

    def create_arranged_cells(self, x_s, y_s, size, cell_type_ids=None):
        """
        this function creates vertically arranged cells.

        x_s, ys - coordinates of bottom_left corner of the cell arrangement
        size - size of the cell arrangement
        cell_type_ids - list of cell type ids

        """
        cluster_id = None
        for i, cell_type_id in enumerate(cell_type_ids):
            cell = self.new_cell(cell_type=cell_type_id)

            if i == 0:
                cluster_id = cell.clusterId
                self.leading_cells_ids.add(cell.id)
            else:
                # to make all cells created by this function, we must reassign clusterId
                # of all the cells created by this function except the first one
                # When the first cell gets created, it gets reassigned clusterId by
                # CompuCell3D and we will use this clusterId to assign it to all other cells created by this function
                self.reassign_cluster_id(cell=cell, cluster_id=cluster_id)
            self.cell_field[x_s : x_s + size, y_s + i * size : y_s + (i + 1) * size, 0] = cell

    def step(self, mcs):

        if mcs < 300:
            return

        if not mcs % 500:
            # randomize force applied to leading cell
            for cell in self.cell_list:
                if cell.id in self.leading_cells_ids:
                    cell.lambdaVecX = random.randint(-self.maxAbsLambdaX, self.maxAbsLambdaX)
                    cell.lambdaVecY = random.randint(-self.maxAbsLambdaX, self.maxAbsLambdaX)
Let us outline the changes we made
1. Instead of using self.list_of_leading_cells to store cell objects, we use a set self.leading_cells_ids to store cell ids (integers).
Python set has this nice property that lookups are instantaneous.
2. Instead of iterating the list with cell objects we iterate over each cell in the simulation (yes,
a bit inefficient by we can speed it up by iterating over cells of type Top) and we check if cell.id is in self.leading_cells_ids
and only then we apply the force.
This change will avoid accessing Top cell object that was deleted in the course fo the simulation.
In summary, in this case study we have demonstrated how to turn a very simple simulation involving just a single cell into a not-so-trivial simulation that involves multiple motile, elongated compartmental cells.