LengthConstraint Plugin
This plugin imposes an elongation constraint on the cell. It “measures” a cell along its “axis of elongation” and ensures that the cell length along the elongation axis is close to the target length. For detailed description of this algorithm in 2D see Roeland Merks’ paper “Cell elongation is a key to in silico replication of in vitro vasculogenesis and subsequent remodeling” Developmental Biology 289 (2006) 44-54). This plugin is usually used in conjunction with the Connectivity Plugin or ConnectivityGlobal Plugin.
The syntax is as follows:
<Plugin Name="LengthConstraint">
    <LengthEnergyParameters CellType="Body1" TargetLength="30" LambdaLength="5"/>
</Plugin>
LambdaLength determines the degree of cell length oscillation around
TargetLength parameter. The higher LambdaLength the less freedom a cell
will have to deviate from TargetLength.
In the 3D case, we use the following syntax:
<Plugin Name="LengthConstraint">
     <LengthEnergyParameters CellType="Body1" TargetLength="20" MinorTargetLength="5" LambdaLength="100" />
</Plugin>
Notice a new attribute called MinorTargetLength. In 3D it is not
sufficient to constrain the “length” of the cell you also need to
constrain the “width” of the cell along an axis perpendicular to the major axis
of the cell. This “width” is referred to as MinorTargetLength.
The parameters are assigned using Python – see Demos/elongationFlexTest example.
To control length constraint individually for each cell we may use
Python scripting to assign LambdaLength, TartgetLength and in 3D
MinorTargetLength. In Python steppable we typically would write the
following code:
self.lengthConstraintPlugin.setLengthConstraintData(cell,10,20)
which sets length constraint for cell by setting LambdaLength=10 and
TargetLength=20. In 3D we may specify`` MinorTargetLength`` (we set it to 5)
by adding 4th parameter to the above call:
self.lengthConstraintPlugin.setLengthConstraintData(cell,10,20,5)
Note
If we use CC3DML specification of length constraint for certain cell types and in Python we set this constraint individually for a single cell then the local definition of the constraint has priority over definitions for the cell type.
If, in the simulation, we will be setting length constraints for only a few individual cells then it is best to manipulate the constraint parameters from the Python script. In this case, in the CC3DML we only have to declare that we will use a length constraint plugin and we may skip the definition by-type definitions:
<Plugin Name="LengthConstraint"/>
Note
IMPORTANT: When using target length, plugins it is important to use the connectivity constraint. This constraint will check if a given pixel copy breaks cell connectivity. If it does, the plugin will add a large energy penalty (defined by a user) to change energy effectively, prohibiting such pixel copy. In the case of 2D on square lattice checking cell connectivity can be done locally and thus is very fast. In 3D the connectivity algorithm is a bit slower but its performance is acceptable. Therefore if you need large cell elongations you should always use connectivity in order to prevent cell fragmentation
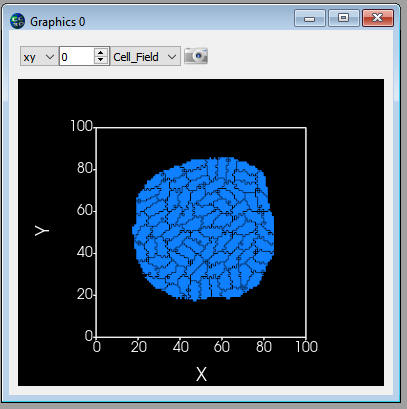
Here’s how a cluster of elongated cells might look: